
Candle Care & Safety

Wick Trimmer: Trimming your wick to 1/4” after every burn will ensure the longest and safest possible burn time. I recommend the one pictured, as the smaller end fits well in smaller containers. Click the link to purchase from Amazon.
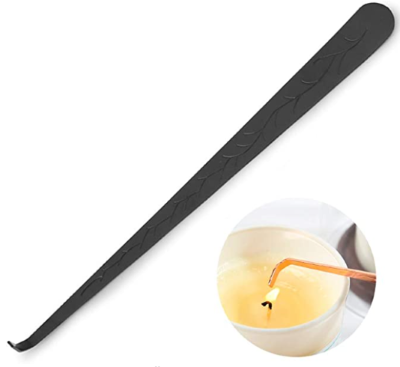
The Wick Dipper is used to safely extinguish a flame while minimizing the amount of smoke produced. The one I use and recommend is pictured. Click the link to purchase from Amazon.
1. While this is not absolutely necessary, I have found that allowing the wax to melt until it is close the container edge (2 to 3 hours), during the first burn, does help ensure an even burn pattern throughout the life of your candle. If for any reason, you are not able to burn to the candle for 2-3 hours during the first burn, no worries, the candle will burn hot enough for the wax to eventually burn from the sides of the container.

This is an 8 oz tin showing the melt pool covering the entire top of the candle, all the way to the edge of the container.
2. Never burn your candle for longer than 3 - 4 hours at a time. Longer burn times may cause the container to get too hot. *Please note that the candle tins will be always be warm/hot when the candle is burning - we test to make sure they won’t be excessively hot, but they will still reach an “ouch” temperature if you burn for longer than 3-4 hours.
3. Trim the wick to 1/4" between burns. This keeps your wick working correctly! You can either trim it with scissors or a wick trimmer. Alternatively, you can use your fingers to ‘pinch off’ the excess carbon. This will keep your candle burning properly and extend the life of the candle. Too much carbon build-up can cause the candle to burn too hot - decreasing burn time and performance.

4 oz. candle after first burn. After cooling, pinch the top of the wick to remove the excess carbon.

This is a little messy - but I wanted to show the removal of the excess carbon. As you can see, the wick is now trimmed to a level that will provide the best performance on your next burn.